Road Bike Upgrade Priority Guide
Start by locking your fit and frame: get a pro fit, confirm bottom bracket and fork specs, and verify tire clearance.
Next, upgrade wheels for the best aero and weight gains.
Choose balanced rims and durable hubs that match axle, rotor, and cassette standards.
Fit quality tires and a tubeless setup for lower rolling resistance and comfort.
Then, address drivetrain reliability and brakes, finishing with saddle and cockpit tweaks.
Keep going to see detailed priorities, compatibility notes, and service tips.
Quick Overview
- Upgrade wheels first for the biggest real-world gains in weight, aerodynamics, and ride quality.
- Fit and frame adjustments (professional fit, geometry check) should precede component swaps.
- Prioritize tires and a tubeless setup for lower rolling resistance and improved comfort.
- Choose a reliable mid-level groupset and address drivetrain wear before full replacement.
- Improve brakes and comfort items last; ensure rotor size, pad compound, and ergonomic fit.
Top 5 Road‑Bike Upgrades : Ranked by Performance per Dollar
Which upgrades give you the biggest speed and comfort gains per dollar spent? You’ll find wheels, tires, and contact points lead the list. Upgrading to a better wheelset delivers measurable aero gains and weight savings that cut both rotational inertia and overall mass.
High‑quality tires and switching to tubeless or lighter tubes lower rolling resistance and improve comfort without a huge outlay. Next, a mid‑level groupset or targeted cassette/chainring changes optimize gearing and shifting precision; this improves efficiency on climbs. Better brakes or pads enhance control and confidence, especially with disc systems.
Finally, a saddle and cockpit tune (bar shape, tape, stem) refines fit and endurance. Prioritize parts that transfer across bikes and avoid replacing the frame.
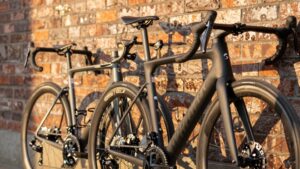
Fit & Frame: What to Lock In Before You Upgrade
Before you spend on wheels or groupsets, lock in a frame and fit that suit your riding goals and body. They set the immutable geometry, handling characteristics, and long-term compatibility that upgrades will live on. Choose frame materials and geometry that match intended use: endurance, racing, or mixed terrain. Confirm disc brakes, thru-axles, tire clearance and manufacturing tolerances.
Get a professional fit to establish stack, reach, and seat position. This minimizes compensations later and guarantees ergonomic load distribution. Inspect bottom bracket standards and fork compatibility so future parts fit without costly adapters.
- Verify intended geometry and tire clearance for your riding style.
- Prioritize reliable frame materials over spec‑heavy cheap carbon.
- Confirm disc/thru‑axle standards for parts compatibility.
- Lock seat position with a measured bike fit before upgrades.
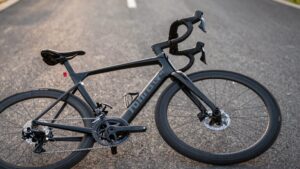
Wheels to Change First : Where to Spend and What to Avoid
Now that your frame and fit are settled, upgrade wheels first because they give the biggest measurable performance gain for the money. You’ll see true weight savings and improved rotational inertia. Spend on a balanced wheelset (light rim, quality hub) rather than flashy deep-section rims that mismatch your riding.
Watch compatibility concerns: axle type, rotor mount, cassette body, and tire width must match your frame and brakes. Avoid cheap carbon or very deep rims if you ride varied terrain.
| Spend on | Benefit | Avoid |
|---|---|---|
| Mid-depth carbon or quality alloy | Aerodynamics + lower rotational mass | Very deep rims for climbing-heavy use |
| Durable hubs & bearings | Long-term rolling efficiency | Poorly specified axle/rotor standards |
| Proper rim width for tires | Better comfort and aero pairing | Mismatched tire clearance decisions |
Tires & Tubeless: The Fastest, Cheapest Gains
Start by swapping tires and going tubeless: it’s the highest-return, lowest-cost upgrade you’ll make. You’ll drop rolling resistance, improve compliance, and reduce flats if you set up a proper tubeless setup. Choose tires with proven carcass construction and match bead width to rims. Pick sealant types for climate and mileage; some sealants heal fast, others last months. Install requires tape, valves, and a compressor or high-volume pump. Inspect beads and torque rims per spec.
Fit tires that clear with planned pressures and loads. Use rim tape rated for tubeless pressures and tape width. Select sealant types (latex vs polymer) based on longevity and puncture size. Maintain periodic sealant top-ups and visual checks for leaks.
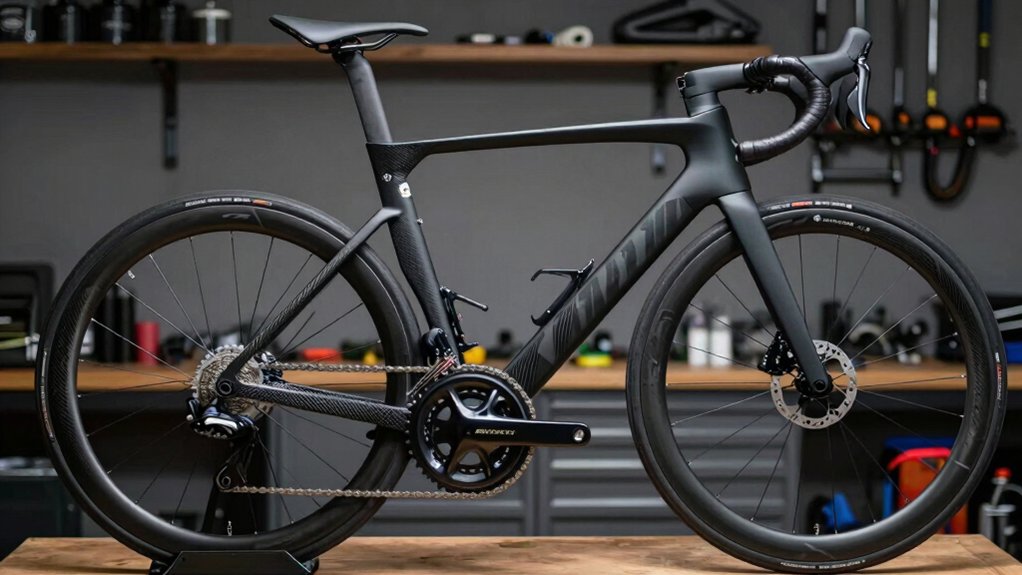
Groupset, Brakes & Comfort: Finishing Swaps and Sequencing
How do you sequence groupset, brake, and comfort upgrades to get the most rideability per dollar? Start with drivetrain reliability: swap to a mid‑level groupset (Shimano 105 or SRAM Rival) for durable shifting and better gear range. Then tune chain, cassette, and chainrings before a full group replace.
Next, upgrade brakes for control; hydraulics if your frame permits, paying attention to rotor size and pad compound. If you go electronic, plan di2 integration early to guarantee battery placement and compatible shifters. Throughout, sort cable routing and housing to eliminate drag and improve modulation. Neat routing also simplifies future swaps.
Finish with comfort items (saddle, bar tape, ergonomic bars) after handling and braking are settled.
Frequently Asked Questions
You’ve got practical questions about what to upgrade first, how much performance you’ll actually buy per dollar, and whether parts will fit your bike. Let’s answer those.
I’ll cover common upgrade choices, cost-versus-performance tradeoffs, fit and compatibility checks, plus routine maintenance you should plan for. Use these FAQs to prioritize upgrades that give measurable gains without creating compatibility headaches.
Common Upgrade Questions
Wondering which upgrade gives the biggest real-world gain? You’ll usually see the most measurable benefit from wheels or tires. But don’t ignore warranty and shop protections: check brand warranties and return policies before buying so you can swap or RMA if problems appear. Ask these common questions to decide next moves.
- Will new wheels fit my frame, brake rotor, and cassette standards?
- How much weight and aero gain will a wheelset realistically add for my riding?
- Can I run tubeless tires with my rims and will shops support the install?
- Is shifting or brake feel better improved by a partial groupset upgrade or full replacement?
Use precise fit checks, compare measured gains, and verify serviceability to avoid wasted spend.
Cost Versus Performance
Although budget limits inevitably shape upgrade choices, you should focus on cost-per-performance gains to get the most mileage from each dollar. You’ll evaluate cost tradeoffs by comparing measurable gains: rotational weight saved, rolling resistance reduction, braking power; and price.
Prioritize upgrades with high performance-per-dollar: tires, tubes, and wheels typically beat full groupset swaps for lap time and ride feel. Consider budget impact across the bike: spending heavily on wheels but neglecting brakes or fit yields diminished returns.
Use incremental upgrades—better cassette, lighter tires, improved saddle—to spread cost and test real gains before bigger purchases. Track resale value too; components with broad market demand reduce net expense when you upgrade again.
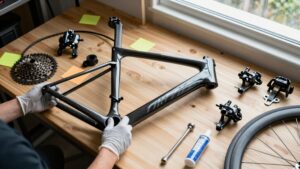
Compatibility And Fit
How do you guarantee parts actually fit and work together when upgrading? You check standards, dimensions, and your fit targets before buying. Confirm bottom bracket shell type, crank length compatibility with chainstay clearance, and headset/headtube standards. Match brake mounts and rotor sizes to wheel hubs.
Don’t forget saddle setback and rail compatibility when changing saddles; measure fore-aft position against your current fit. Use spec sheets and calipers for critical tolerances.
- Verify bottom bracket shell width and spindle interface before crank swaps.
- Measure saddle setback from the bottom bracket to reproduce position.
- Confirm cassette/freehub body type and derailleur hanger alignment.
- Check axle spacing and rotor mount (centerlock vs. 6-bolt) for wheel-brake fit.
Maintenance And Care
Keep your bike reliable and efficient by following a straightforward maintenance routine: clean and lubricate the drivetrain every 200–400 miles (or after wet rides). Check tire pressure and inspect tires before each ride. Verify quick-release/thru-axle tightness, brake function, and headset/seatpost clamp security weekly.
You should prioritize chain lubrication and routine frame cleaning to prevent wear and corrosion. Inspect wear items (chain, cassette, brake pads) monthly and replace before failure. Keep torque specs for stem, saddle clamp, and crank. Use fresh hydraulic fluid or bleed brakes annually. Store indoors, avoid prolonged UV exposure, and address creaks via bottom bracket and headset checks.
| Task | Frequency |
|---|---|
| Drivetrain | 200–400 mi |
| Tires | Pre-ride |
| Brakes | Weekly |
| Full service | Annually |
Conclusion
Before you start swapping parts, lock in fit and frame. Nothing else makes up for a poorly sized bike.
Prioritize wheel and tire upgrades for the best performance-per-dollar gains: fast, light rims and good tubeless rubber are the most noticeable. Move to groupset or brake changes only after fit, wheels, and contact points are dialed.
Sequence upgrades to solve the biggest losses first; spend where you feel speed and comfort, and avoid duplicating small gains.