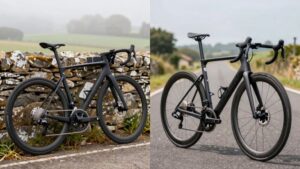
Road Bike Geometry Explained
Road bike geometry defines how a frame positions you and how it handles: reach and stack set cockpit length and height; head‑tube length and angle tune steering and posture.
Seat‑tube angle controls fore‑aft hip bias for power.
Wheelbase, chainstay length, and BB drop trade stability, agility, and pedal clearance.
Use the stack÷reach ratio to gauge race versus endurance orientation.
Match those numbers to your flexibility and goals for efficient power transfer and predictable handling.
Keep going and you’ll get practical selection steps.
Quick Overview
- Geometry uses reach and stack (horizontal and vertical cockpit coordinates) to determine rider posture and fit.
- Head-tube angle, fork rake, and trail primarily predict steering feel and high-speed stability.
- Seat-tube angle and saddle fore-aft control fore-aft hip position and pedaling muscle recruitment.
- Wheelbase and chainstay length trade agility versus straight-line stability and rear weight distribution.
- BB drop, tire clearance, and chainstay length affect pedal clearance, cornering confidence, and frame purpose: race, endurance, gravel.
Bike Geometry: What It Is and Why It Matters
What exactly is bike geometry and why should you care? You evaluate a frame by its measurable relationships: tube lengths, angles, wheelbase, reach, and stack. These variables define posture, handling, and pedaling efficiency rather than mere style.
You’ll use reach and stack to predict cockpit length and vertical clearance. You will use wheelbase and chainstay length to anticipate stability versus agility. Additionally, you will use seat tube angle and BB drop to estimate power transfer and center-of-gravity.
Don’t confuse subjective aesthetic preferences or persuasive marketing claims with functional geometry; cosmetics won’t change trail or effective reach. When you compare models, prioritize numbers that match your intended use: racing, endurance, or mixed terrain. That precision yields predictable fit and performance on the road.
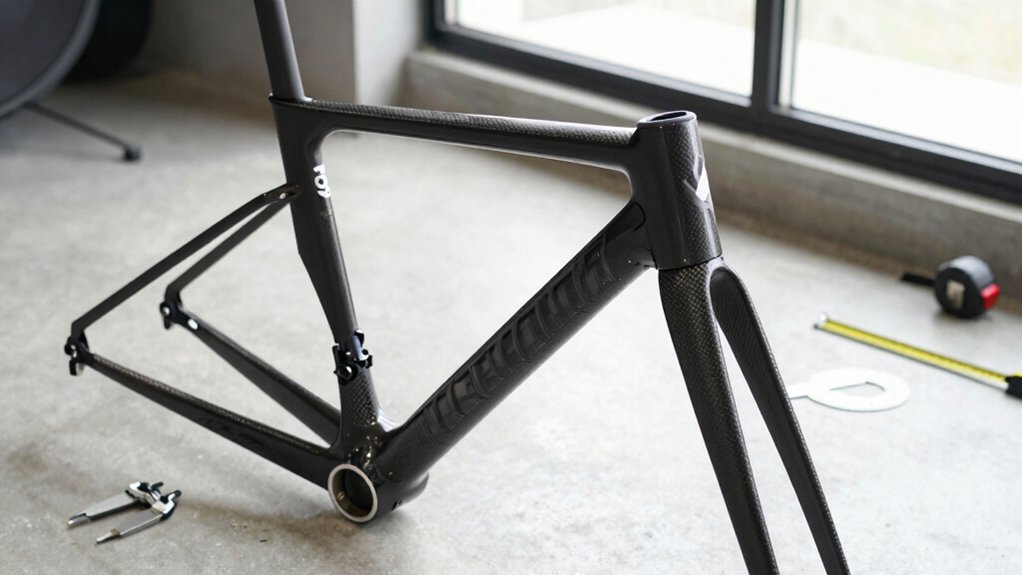
Key Tube Measurements: Top, Down, Seat, Head
Start by reading the four primary tubes—top, down, seat, and head—because their lengths, angles, and junctions establish the frame’s core geometry and directly determine fit, handling, and load paths.
You’ll measure effective top-tube length for cockpit reach, down-tube length for stiffness and load transfer, seat-tube length and angle for pedaling position, and head-tube length and angle for steering and posture.
Inspect tube shaping for aerodynamic or compliance goals and note material thickness changes where loads concentrate at junctions. Precision in these dimensions lets you predict handling: longer down tubes increase longitudinal stiffness; steeper seat tubes advance pedaling efficiency; shorter head tubes lower the front end for aggressive posture.
Use measured tube values to compare intended ride character.
Reach and Stack: Fit, Posture, and the STR Ratio
How far forward and how high you sit on the frame fundamentally shapes both comfort and performance. You’ll want to focus on reach and stack as primary fit metrics. Reach is the horizontal datum from the bottom bracket to the head-tube top; stack is the vertical. Together they define your cockpit relative to saddle height and torso length, determining spinal angle, shoulder loading, and aerodynamic posture.
Calculate STR ratio (stack ÷ reach) to classify geometry: below 1.45 biases racing positions; above 1.45 favors endurance setups. Adjust saddle height first for ideal leg extension. Then modify stem length, spacers, or frame size to tune reach and stack. Aim for small incremental changes and re-assess comfort, power delivery, and neck/shoulder strain.
Head-Tube Geometry: Length, Angle, Steering, and Posture
Why does the head tube matter so much to ride feel and posture? You adjust head-tube length to set stack height; a taller head tube raises your cockpit, reducing torso flexion and improving comfort. A short head tube lowers you for an aggressive aero position.
Head-tube angle pairs with fork rake to define trail; this directly alters steering feel. Steeper angles yield quicker response; slacker angles smooth steering and enhance directional stability. You’ll balance torso height, handling, and aero impact when selecting geometry. Short head tubes favor reduced frontal area but demand greater rider control.
Ergonomically, small changes in head-tube dimensions shift weight distribution over the front wheel. This affects cornering confidence and sustained posture over long rides.
Wheelbase & Chainstay Geometry: Stability vs Responsiveness
Having set cockpit height and steering geometry with head-tube choices, you now balance longitudinal frame dimensions that govern stability and agility. Wheelbase, the hub-to-hub distance, directly sets yaw damping and high-speed composure: longer wheelbases increase stability and shock absorption; shorter ones yield quicker turn-in and cornering responsiveness.
Chainstay length fine-tunes rear-wheel behavior. Longer chainstays shift weight rearward for predictable tracking and improved tire grip under load, while shorter chainstays quicken acceleration and rear-end feedback. You’ll weigh these gains against aero tradeoffs: longer frames can present a larger effective frontal area and slightly different tube shaping needs.
Design decisions must consider rider size; smaller frames often use longer chainstays. Additionally, intended use and the precise handling envelope you want are crucial factors.
Seat-Tube Angle and Pedaling Efficiency
Because the seat-tube angle determines your fore-aft hip position relative to the bottom bracket, small changes (a degree or two) noticeably shift muscle recruitment and torque application during the pedal stroke.
You’ll find steeper angles move your pelvis forward, altering pelvic tilt so your gluteus and quadriceps contribute more directly at top and mid-stroke. Shallower angles shift load rearward, engaging hamstrings and changing knee tracking through the arc.
For precise fit, measure saddle setback and adjust fore-aft position to maintain neutral pelvic tilt and straight knee tracking over the pedal spindle. In performance setups, incremental angle increases improve direct power transfer and aerodynamic torso position. In endurance setups, slightly slacker angles favor comfort and varied muscle recruitment over long durations.
Bottom Bracket Drop: Cornering and Pedal Clearance
When you lower the bottom bracket drop, you reduce pedal clearance during leaned turns, which raises the chance of toe or pedal strikes on corner exits. You’ll feel a lower center of gravity and improved lateral stability; however, pedal clearance and cornering clearance shrink. That forces you to adjust line and body position to avoid clipping. Frame designers balance BB drop against chainstay length and intended use.
- Imagine leaning hard: pedal tip approaching pavement as cornering clearance narrows.
- Picture a shallow BB drop: lower torso, more stability, but reduced pedal clearance.
- Visualize a higher BB drop: more pedal-room, quicker cornering inputs, slightly less planted feel.
Select BB drop to match your riding style and the predictable cornering envelope you need.
Reading a Geometry Chart and Choosing the Right Frame
To choose the right frame, read the geometry chart as a set of functional measurements that describe how the bike will position you and handle on the road. You’ll compare stack, reach, head tube length, seat tube angle, wheelbase and chainstay length to predict posture, steering responsiveness and stability.
Use stack-to-reach ratio to classify race versus comfort orientation. Note trail and head angle for steering feel. Check bottom bracket drop and pedal clearance for cornering confidence. Factor in sizing adjustments—stem length, spacers, saddle fore/aft—before assuming a different frame size.
Finally, weigh pricing trends against build and customization options: decide whether factory geometry meets your ergonomic targets or if bespoke tweaks justify higher cost.
Quick Picks: Geometry by Riding Style (Race, Endurance, Gravel)
Which geometry suits your riding goals? You’ll pick based on reach, stack and handling targets: race fit for aggressive posture, endurance for comfort, and gravel geometry for mixed surfaces. Focus on measurable trade-offs.
- Race: short wheelbase, long reach, low stack; tight handling, aerodynamic posture. Steep seat tube angle for efficient power transfer in a race fit.
- Endurance: longer wheelbase, short reach, tall stack; stable, upright position that reduces fatigue. Longer chainstays absorb shocks.
- Gravel: moderate reach, higher stack, slacker head angle; stable at speed, compliant for rough surfaces. Increased tire clearance and slightly lower BB for traction.
Choose by measured reach/stack ratios and intended terrain.
Frequently Asked Questions
You’ll find clear answers here to the geometry questions that matter most: fit and sizing, handling and stability, comfort over distance, and how to choose the right frame.
I’ll explain how stack/reach, head tube and seat tube angles, wheelbase and chainstay length, and BB drop translate to fit, control, and endurance. Use those metrics to compare frames objectively and match geometry to your riding goals.
Fit And Sizing
When you’re choosing a road bike, fit and sizing hinge on precise measurements. Reach and stack determine your cockpit balance; seat tube angle governs your pedaling position, and wheelbase plus chainstay length affect stability and handling. Matching these numbers to your biomechanics guarantees efficient power transfer, comfort, and predictable steering. You’ll aim for an ergonomic fit through measured adjustments: stem length, saddle setback, and spacer stack.
Consider custom sizing if off-the-shelf frames force compromises. Assess reach vs. torso/arm length and stack vs. shoulder flexibility to avoid lumbar strain or numbness. Use cleat position and seat height to fine-tune leg extension and knee tracking. Document dimensions so you can replicate a proven fit across frames or when ordering custom sizing.
- Visualize stem length and handlebar drop.
- Imagine saddle setback vs. pedal spindle.
- Picture stack-to-reach ratio in profile.
Handling And Stability
Having matched reach, stack, seat tube angle, and chainstay length to your body, you’ll next evaluate how those geometry choices affect handling and stability in real-world riding. You’ll assess wheelbase, trail, and head tube angle to predict responsiveness: shorter wheelbase and steeper head angles quicken steering; longer wheelbase and slacker angles damp oscillations.
Consider bottom bracket drop and chainstay length for lateral stability and cornering predictability. Pay attention to grip dynamics—tire contact patch, handlebar width, and weight distribution determine front-end traction during load shifts. Test stability in crosswinds to judge crosswind response: deeper section rims and taller profiles increase yaw, so balance aero choices with stability needs.
Use incremental adjustments to reach a controllable, confidence-inspiring chassis.
Comfort Over Distance
Although comfort often feels subjective, you can quantify and optimize it by evaluating geometry, fit, and component choices that affect posture, load distribution, and vibration damping. You’ll assess stack-to-reach, wheelbase, and seat tube angle to position weight over the BB for efficient power transfer and improved seat comfort. Choose compliance-focused materials and contact points to reduce micro‑vibration over long rides.
- Short chainstays plus moderate wheelbase: responsive handling with controlled rear-end compliance.
- Taller head tube and longer stack: upright posture, reduced shoulder and wrist loading.
- Softer saddle, tuned seatpost flex, and tire pressure: targeted vibration damping to preserve comfort.
Measure and adjust systematically; small geometry changes yield predictable ergonomic effects.
Choosing The Right Frame
Why pick one frame over another? You evaluate geometry, material, and intended use: stack/reach, head tube length, chainstay, and BB drop determine fit and handling. You’ll choose race or endurance based on STR ratio and wheelbase. Consider seat tube angle for pedaling efficiency.
| Attribute | Impact |
|---|---|
| Stack/Reach | Fit, posture |
| Wheelbase | Stability vs agility |
| Seat tube angle | Power position |
| BB drop/Chainstay | Cornering, pedal clearance |
| Head tube/Trail | Steering feel |
Also weigh color trends for resale and aesthetics. Check brand compatibility for component fit and warranty. Measure reach and stack with your fit data, test ride similar geometries, and prioritize precise fit over styling.
Conclusion
You’ve seen how tube lengths, reach/stack, head-tube angles, wheelbase, chainstays and BB drop work together to define handling, comfort and clearance. Use reach and stack to dial fit; head-tube geometry to tune steering and posture; and wheelbase/chainstay measures to balance stability versus responsiveness.
Read charts by comparing multiple metrics, not just seat tube size. Match geometry to intended use—race, endurance or gravel—to get predictable, efficient handling and ergonomic comfort.