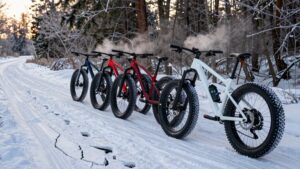
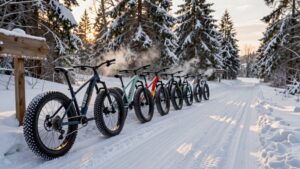
Fat Biking in Snow Tips
You’ll ride safer and farther if you prep your bike, body, and kit for cold, low-pressure conditions: set wide rims with big-volume tires and start around 8–10 psi.
Drop to ~6 for deep powder.
Fit a clutched derailleur and low gearing.
Check brakes and spare tube fit fat rims.
Pack a pump, multi-tool, map, phone in waterproof case, insulated blanket, and extra batteries.
Layer base, mid, and shell plus warm gloves, bar mitts, and insulated boots.
Keep moving and you’ll learn more practical tips.
Quick Overview
- Lower tire pressure (start 8–10 psi; drop toward 6 psi for very soft snow) for better flotation and traction.
- Layer clothing: moisture-wicking base, insulating midlayer, and wind/waterproof shell with thin cap and neck gaiter.
- Carry a compact repair kit, spare tube, pump that fits fat rims, waterproof phone, and insulated emergency blanket.
- Use smooth, steady pedaling with centered weight in deep snow. Shift rearward and ease pressure to drift or bail to a controlled walk.
- Clean salt and slush after rides, dry and lube the drivetrain, and inspect moving parts for wear or damage.
Quick Pre-Ride Checklist for Snow Riding
Before you head out, run a focused pre-ride check so nothing surprises you on the trail: inspect tire pressure (8–10 psi for most snow; lower for deep powder). Confirm your pumps and spare tube fit your fat rims. Verify brakes and shifting work smoothly. Make sure bar mitts, gloves, and a neck gaiter are packed.
Next, secure essentials: spare batteries for lights and GPS in a waterproof bag, a charged phone, multi-tool, spare derailleur hanger, and extra tube. Do a hydration check—bladders won’t freeze if insulated and bottles need lids snugged. Test quick-release levers, pump pressure with the gauge, and fit of boots on pedals.
If anything feels marginal, fix it now rather than on the trail.
What to Wear: Layers to Keep Core, Head, and Hands Warm
How do you stay warm without sweating yourself into a chill? Layer smart: a moisture-wicking thermal base, insulating midlayer, and a waterproof shell with pit zips for fabric ventilation.
Keep your core regulated so you won’t overheat on climbs or freeze on descents. Protect your head with a thin cap under a helmet and use a neck gaiter or balaclava you can drop when warm.
| Layer | Purpose |
|---|---|
| Base | Move moisture away from skin |
| Mid | Trap heat, breathable fleece |
| Shell | Block wind/wet, vent when needed |
Pack an extra base and socks. Use scent control for food or sweaty items in your pack to avoid wildlife and stinky gear between rides.
Protect Your Extremities: Gloves, Bar Mitts, and Boots
Don’t underestimate your hands and feet. They’re the first to go numb and the hardest to warm back up once you’re cold. Choose gloves for glove warmth first: lobster-claw or insulated liners under thicker mitts give dexterity for shifting while trapping heat.
Use bar mitts so you can run thinner gloves and still modulate brakes and shifters; they block wind and create a pocket of warmth without bulk. For feet, pick boots that combine insulation with sole grip. Flat pedals need winter boots with aggressive lug patterns for boot traction.
Consider hot packs in gloves and toe warmers in boots on long rides. Test everything before a long outing: mobility, braking feel, and how long glove warmth and boot traction last in real cold.
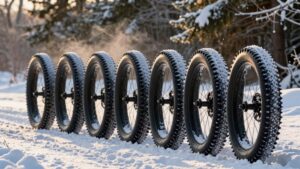
Tire and Rim Setup: Tire Choice, Widths, and Pressure for Snow
Tire and rim choices make the biggest difference in how a fat bike floats, steers, and grips on snow, so choose deliberately: wider rims and big-volume tires give flotation in deep, soft snow. Narrower setups and slightly firmer pressures slice through hardpack and tracked trails for better steering. You will want deep tread depth for bite on loose snow and studs only when ice is likely.
Match tire width to rim width; 80–100mm rims with 4.5–4.8″ tires float. Narrower rims with 3.8–4.2″ tires track better. Start around 8–10 psi, drop to 6 psi in very soft snow, and raise pressure on icy hardpack.
| Rim width | Tire width |
|---|---|
| 80 mm | 4.5–4.8″ |
| 100 mm | 4.8″ |
| 70 mm | 3.8–4.2″ |
| 60 mm | 3.6–3.9″ |
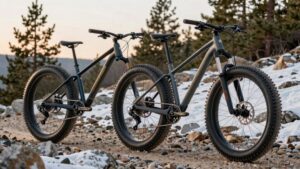
Gearing and Drivetrain Tweaks for Snowy Climbs
Because snow adds resistance and unpredictability, you’ll want a drivetrain that gives low, smooth gears and dependable shifting when you’re slogging uphill, braking, and remounting. Drop to a smaller chainring, around 28T, to cut leg mash on soft pitches. That chainring optimization pays off every time you remount exhausted.
Pair it with wide cassette ratios like a 10-51T or 10-52T so you can spin comfortably without granny-crawling. Run a clutched derailleur, fresh cables, or a tidy, lubed chain for crisp shifts in slush. Consider a slightly shorter crank to reduce pedal strikes. Use a bash or narrow-wide ring to keep the chain on in bouncy, uneven snow. Tune limits and check preload before you ride.
Pre-Ride Mechanical Checklist and Must-Have Cold Tools
Before you head out, run a quick, focused mechanical checklist so nothing surprises you in cold, remote conditions. You want reliability more than speed: check drivetrain, brakes, and tire seating while it’s warm. Carry a compact kit and know how to use each piece.
- Inspect derailleur, bolts, and carry a spare hanger. Cold metal snaps, and a hanger saves a ride.
- Check tire bead, valve, and pack a tire patch plus an extra tube for rapid repairs.
- Bring a multi-tool, chain quick-link, pump with gauge, and extra zip ties or duct tape.
- Add thin gloves for fiddling. Bring a small folding shovel and chemical hand warmers to keep dexterous.
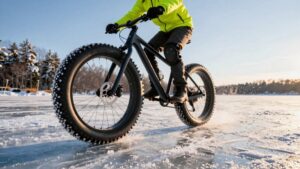
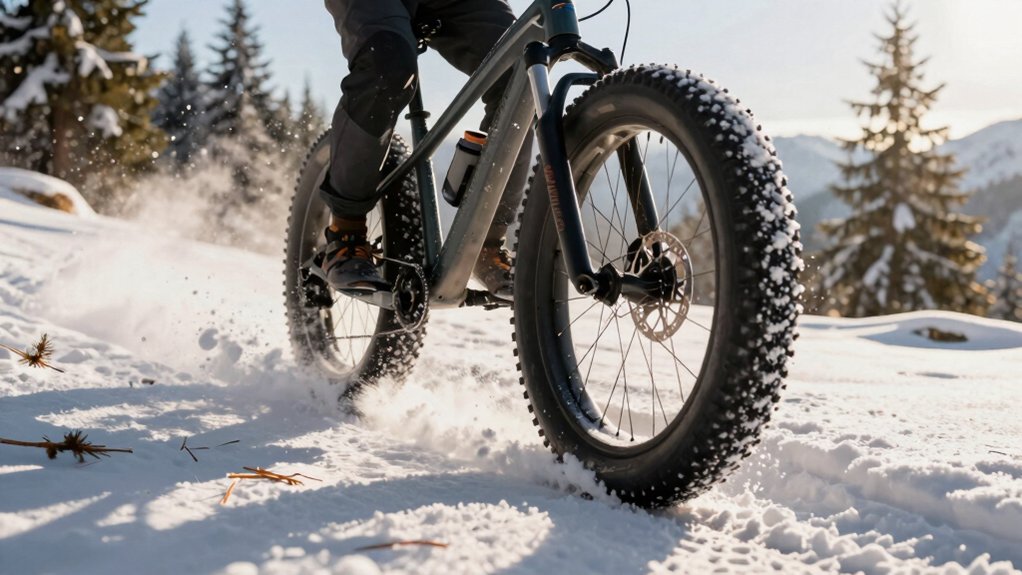
Riding Techniques and Quick Fixes for Deep Snow, Hardpack, and Ice
When the trail turns to deep snow, hardpack, or glare ice, you’ll change how you move, where you put weight, and which gears you pick to stay balanced and make progress. In deep snow, keep weight centered and pedal smoothly in a low gear. Let the tires float by easing pressure and keeping cadence steady.
On hardpack, use slightly higher pressure, ride the edges for grip, and shift to a mid-range gear so you can accelerate out of punchy spots. For glare ice, slow down, lower your center of gravity, and focus on ice navigation: choose lines with textured snow or tracks.
Quick fixes: bail to a controlled walk, let air out for more float, or use drift control by shifting weight rearward to power through soft transitions.
Frequently Asked Questions
You’re going to get quick, practical answers on tire pressure tweaks, how to layer for changing temps, the trail-safety musts, and basic maintenance you can do roadside. Expect clear pressure ranges and when to drop or raise PSI. You will also find exact clothing combos to start slightly cool, and simple checks to avoid a walkout.
Use these FAQs as a field guide so you can adjust fast and stay riding.
Tire Pressure Tips
Tire-pressure tuning is one of the biggest levers you’ve got for improving float, traction, and control on snow; so expect to experiment. You’ll use density testing and pressure experiments to find what suits your weight, tire width, and trail. Start conservative, then lower pressure in small steps. Watch handling and rim strikes. Carry a gauge and pump.
- For deep, soft snow, drop to 6–8 psi for maximum float; wider rims tolerate less pressure.
- On hardpack or mixed conditions, run 8–10 psi to avoid squirm and pinch flats.
- Use incremental changes (1–2 psi) and re-evaluate after a few corners.
- If you feel sluggish or get rim bangs, raise pressure slightly and reassess.
Trust what the tires tell you.
Clothing Layering Advice
Frequently, your best bet is to think in three purposeful layers: a moisture-wicking base that keeps sweat off your skin, an insulating midlayer that traps warmth, and a wind- and waterproof shell you can dump heat through or seal up against storms. You’ll choose pieces for fabric breathability so moisture moves outward, not pooled against your skin.
Start with snug base layers; add a fleece or light down midlayer. Then top with a hooded shell that has pit zips for quick venting. Pay attention to layer sequencing: base, mid, shell — but adjust on climbs and descents.
Keep thin glove liners under warm mitts and pack an extra base and socks. When you manage moisture and airflow, you stay warm and comfortable.
Trail Safety Essentials
How do you stay safe when the trail turns unpredictable? You prepare deliberately, read conditions, and choose control over speed. Use clear hazard signaling and strong visibility strategies so others spot you early. Check your kit before departure.
- Carry a bright light and reflective tape; signal hazards with whistle bursts and arm gestures.
- Scout blind corners on foot; watch packed snow for hidden roots and ice patches.
- Ride with a buddy when possible; agree on rendezvous points and emergency signals.
- Pack a small repair kit, map, phone in waterproof case, and insulated emergency blanket.
Stay calm, slow into surprises, and communicate. Those actions keep you upright and moving home.
Bike Maintenance Basics
Want your fat bike to keep riding like new all winter? You should clean salt, slush, and grit after every ride. Wipe the frame, degrease drivetrain, and dry moving parts.
Check chain lubrication before and after cold rides. Use a wet lube for persistence in slushy conditions and wipe off excess to avoid grit pickup. Inspect tires and confirm your tubeless setup sealant level; cold makes sealant thicken, so refresh mid-season.
Carry spare tubes and a plug kit if you run tubeless. You should also bring a compact pump and multi-tool. Tighten bolts, check brake pads for glazing from grit, and inspect the derailleur hanger.
Store the bike indoors on a stand to dry and prevent rust.
Conclusion
You’ve prepped gear, layered smart, and tuned tires and drivetrain for snow. Now ride with confidence. Stay relaxed over the bars, pick lines on hardpack, and let momentum carry you through soft sections. When ice shows up, slow, look ahead, and use gentle braking.
Keep tools and a pump handy for quick fixes. Check hands and feet often, and bail early if conditions turn. Enjoy the silence, stay safe, and have fun.