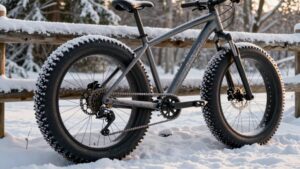
Fat Bike Tire Pressure for Trails
You’ll want to run low but controlled pressures for trails; typically 7–15 PSI depending on tire width, rider weight, and terrain.
Start in the manufacturer’s range, use a firm thumb press, then change 1–2 PSI at a time and ride short sections to feel it.
Lower pressure improves traction and comfort on rocks, roots, snow, or sand.
Higher pressure helps rolling on hardpack.
Follow gauge checks and tuck a pump and spare core if you tweak more.
Quick Overview
- Start with manufacturer-recommended PSI. Then adjust based on tire width and rider weight: wider tires and lighter riders run lower pressures.
- For mixed dirt and groomed trails, aim for 8–15 PSI. For technical rocky singletrack, target 7–12 PSI.
- Drop to 4–7 PSI for soft sand or deep snow. Use 6–10 PSI for packed or groomed snow.
- Make 1–2 PSI changes; use a reliable low-pressure gauge. Test by thumb press and short ride sections.
- Raise rear pressure first if you carry weight back. Log successful pressures and reseat bead/check valve cores after big changes.
Quick Answer : Fat Bike PSI Ranges for Common Trail Types
When you need a quick rule of thumb, set fat bike tires roughly like this: paved or hardpack 12–20 PSI, groomed trails and dirt roads 8–15 PSI, rocky/rooty singletrack 7–12 PSI, packed snow 6–10 PSI, and soft sand or deep snow 4–7 PSI. Then fine-tune by 1–2 PSI based on your weight and feel.
You’ll use lower pressures for more cushioning and traction; higher for rollability and efficiency. Think practically: wider tires need less pressure to support you. This is myth busting for riders who assume higher PSI always equals speed; on trails it’s a balance.
Trend forecasting in tire tech suggests larger volumes will push ideal pressures lower. So test within these ranges and record results for consistency.
How to Test and Adjust Tire Pressure on the Trail (Thumb Test + 1–2 PSI Steps)
If you want reliable on‑trail adjustments, start with the simple thumb test to gauge “squish” and then tweak pressure in 1–2 PSI steps while riding short sections to feel the change. First, press the center tread with your thumb: the tire should compress slightly but resist. Too soft and you’ll risk rim strikes; too hard and you lose traction. Carry a small pump and a low‑pressure gauge for precise top‑ups. A quick pump calibration at home helps avoid surprises.
Make one PSI change, ride 200–500 yards, and note cornering, traction, and bump absorption. Repeat in 1–2 PSI increments until handling matches the trail. Periodically verify gauge accuracy and recheck thumb feel after several runs.
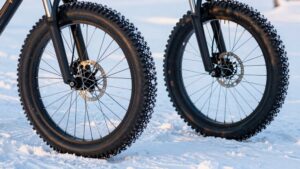
How Rider Weight and Tire Width Change Your PSI
Rider weight and tire width both change ideal PSI, so you should adjust pressures to match your mass and the tire’s air volume. Heavier riders need higher pressures to prevent bottoming; lighter riders can run lower pressures for traction.
Check weight distribution: If you carry a heavy pack or load the rear, raise rear PSI first. Use the tire’s width impact to guide baseline: Wider, higher-volume tires support lower PSI for the same feeling of firmness; narrower fat tires need more pressure.
Start with a nominal value based on weight and tire width, then refine with the thumb test and 1–2 PSI steps. Track changes; one PSI matters until you find consistent cushioning without excessive squirm or rim strikes.
Starting PSI by Surface: Rock, Hardpack, Groomed Snow, Soft Snow, Sand
You’ve already seen how weight and tire width set your baseline. Now use that foundation to pick starting PSI for specific surfaces: rock, hardpack, groomed snow, soft snow, and sand. On rocky, technical singletrack, start around 7–12 PSI so the tire cushions impacts without bottoming the rim. Check how your rim design reacts to side hits.
For hardpack and mixed dirt, aim 12–18 PSI to roll efficiently while keeping traction. Groomed snow works well at 6–10 PSI for float and predictable steering. Soft snow and deep sand need the lowest start, about 4–7 PSI, to increase contact patch and prevent digging.
Use small 1–2 PSI tweaks; note handling; and even consider tire color visibility when dialing pressures.
Why Lower PSI Improves Grip and Cushioning on Technical Trails
Because lower PSI lets the tire deform more, it increases the contact patch and lets the tread mold around rocks, roots and edges. You get more grip and a gentler ride without relying on suspension. You’ll feel bumps absorbed by the tire’s volume as air shifts; this reduces impact spikes and keeps rubber engaged on uneven ground.
Compound research shows softer compounds paired with low pressure improve micro‑traction. They conform to small features and bite without tearing. Understand grip mechanisms: increased contact area, better tread articulation, and slower slip onset.
Practically, drop pressure in small steps; test on technical sections and watch for excessive squirm. Use a reliable low‑pressure gauge and aim for the 7–12 PSI range as a starting point for rocky singletrack.
Avoiding Problems: Rim Strikes, Burps, and Excessive Rolling Resistance
While low pressures boost grip and comfort, they also raise the risk of rim strikes, tire burps, and higher rolling resistance if you push them too far. You’ll balance pressure to avoid rim safety issues by keeping enough air to prevent the bead from pinching on hard impacts. On rocky sections, nudge PSI up a couple points rather than risking a bent rim.
For burp prevention, run a sensible bead-to-rim fit, appropriate sidewall support, and avoid overly soft settings when cornering hard. Watch rolling resistance; if you feel sluggish or the tire squashes excessively, add small increments of pressure until pedaling efficiency returns without sacrificing traction. Test on a short section and adjust 1–2 PSI at a time for repeatable results.
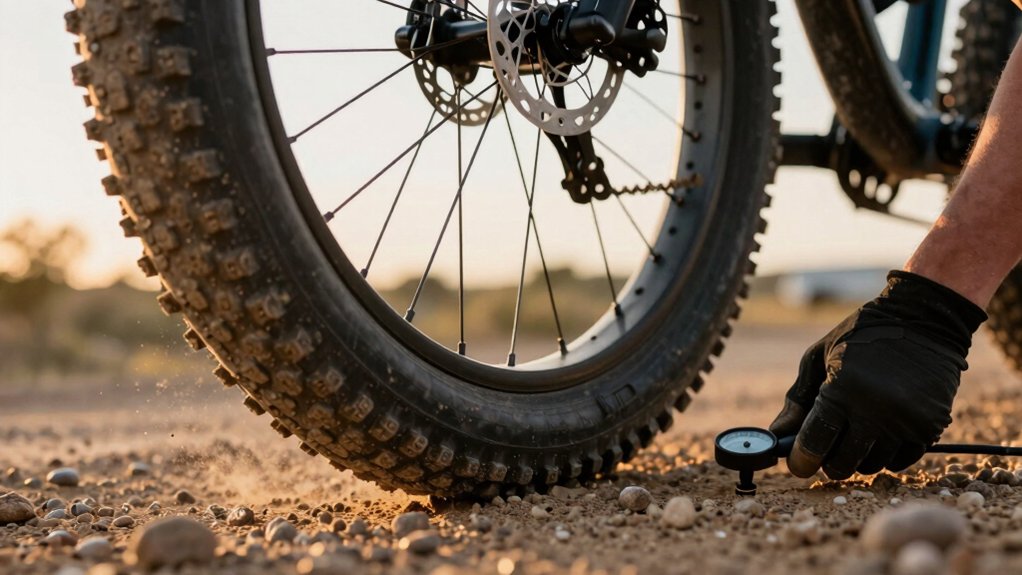
Tools and Reading Manufacturer PSI Charts (Pumps, Low‑Pressure Gauges)
Tools matter as much as technique when dialing fat-bike pressures for trails: you’ll need a pump that’s accurate at low PSI, a reliable low-pressure gauge, and the right adapters for large valves. You check manufacturer PSI charts, confirm pump compatibility with valve type, then set a starting pressure.
Calibrate your gauge regularly; tiny errors change handling.
- Hand pump with a wide base for stable low-PSI strokes.
- Dedicated low-pressure gauge that reads 0–30 PSI clearly.
- Valve adapters sized for fat-bike tubes and tubeless stems.
- Small digital gauge for spot checks mid-ride.
Use chart ranges as starting points, adjust in 1–2 PSI steps, and trust measured readings over feel.
Quick-Reference PSI Cheat Sheet by Tire Width and Trail Condition
Now that you’ve got the right pump and low-pressure gauge and know how to read manufacturer charts, use this quick-reference cheat sheet to pick a starting PSI by tire width and trail condition.
For 4.8″ tires on soft snow or deep sand, start 4–7 PSI; packed snow 6–10 PSI; groomed trails 8–12 PSI; rocky technical 7–10 PSI.
For 4.5″ tires, start 5–8 PSI soft snow; 7–11 PSI packed; 9–14 PSI groomed; 7–12 PSI rocky.
For 4.0″ tires, start 6–9 PSI soft snow; 8–12 PSI packed; 10–15 PSI groomed; 8–12 PSI rocky.
Adjust in 1–2 PSI steps based on rider weight, rim compatibility, and tire tech specifics. Test with a thumb squeeze and carry a pump for on-trail tuning.
Frequently Asked Questions
You’ll want clear starting pressures for different trails. Use the 5–20 PSI band as your baseline and pick narrower ranges by terrain and tire width. Learn to tweak pressure in 1–2 PSI steps for float, grip, or faster rolling. Carry a low-pressure gauge and pump so you can measure and adjust on the fly.
Watch how traction changes with each adjustment: more pressure rolls faster but reduces grip. Less pressure increases contact patch and control but risks rim strikes if you go too low.
Ideal Trail Pressures
Wondering what pressure to start with on trail rides? You’ll begin in the 5–20 PSI band and dial from there based on weight and terrain. Low pressures boost grip and comfort; higher pressures improve roll and prevent rim strikes.
Check tire wear regularly and match pressure to your tire width. Wider tires need less PSI. Also, confirm valve types before inflating: presta and schrader need different adapters and pumps.
- Soft technical singletrack: 7–12 PSI for cushioning and grip.
- Groomed dirt and mixed trails: 8–15 PSI to balance speed and traction.
- Packed snow: 6–10 PSI for float without squirm.
- Soft sand/deep snow: 4–7 PSI for maximum flotation.
Make 1–2 PSI tweaks and monitor feel.
Adjusting For Conditions
How should you tweak tire pressure when conditions change? You drop or raise pressure in small steps: 1–2 PSI at a time based on terrain. Lower for soft snow, sand, or technical rock sections; higher for hardpack and fast groomed trails.
Start with recommended ranges for your tire width and rider weight. Then test feel with a firm thumb press. Watch the tire bead seating after big changes, and check valve cores for proper sealing. Reseat the bead and tighten cores if you hear leaks.
Carry a small pump and spare valve cores if you plan big shifts on a ride. Log successful pressures for specific trails so you can reproduce the setup next time.
Measuring With Gauges
Why check tire pressure with a gauge instead of relying on feel? You want repeatable pressure accuracy every ride. A reliable gauge removes guesswork, helps with gauge calibration, and lets you match recommended PSI to trail type.
- Visualize a dial: clear numbers, no guesswork.
- Imagine a stick gauge: quick, tactile confirmation.
- Picture a digital readout: precise to 0.1 PSI for tuning.
- See a portable gauge in your pack for mid-ride checks.
Use a trusted gauge, verify calibration periodically, and record readings after cooling tires. Check both tires and adjust in 1–2 PSI steps until you hit the target range. That disciplined approach gives consistent handling and prevents rim strikes. This is crucial without discussing traction specifics.
Pressure And Traction
You’ve learned how a good gauge gives repeatable readings; now let’s use those numbers to control traction. Start with a baseline in the 7–12 PSI range on technical trails and 8–15 PSI on groomed dirt. Lower pressure increases contact patch and grip; raise it to reduce rolling resistance. Make 1–2 PSI changes and note differences: too high and you’ll get tire chatter over rough sections; too low and you risk pinch flats or excessive traction wear on fast corners.
Use a thumb test pre-ride. Then, a precise gauge mid-ride if needed. For soft snow or sand, drop toward 4–7 PSI for flotation. Log conditions, weight, and PSI so you refine settings quickly and avoid guesswork.
Conclusion
Dial in your fat bike tire pressure like you’d tune a tool: Start with the suggested PSI for your tire width, surface, and weight. Then drop or raise pressure in 1–2 PSI steps while riding to find the sweet spot. Use a reliable low-pressure gauge or pump. Watch for rim strikes and burps, and favor lower pressure for grip and comfort on technical or soft trails.
Keep notes and adjust for conditions. You’ll ride faster and safer.