How to Ride a Fat Bike on Ice Safely
You’ll prep both bike and body, pick firm, tracked routes, and ride conservatively.
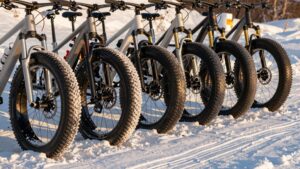
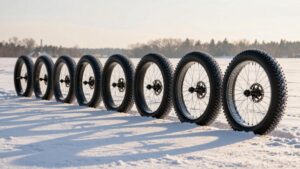
Run tubeless tires very low (about 4–6 PSI) with correctly oriented studs.
Check brakes and drivetrain, and carry a plug kit, pump, and first-aid tools.
Wear layered, visible clothing, helmet, insulated gloves, and boot traction.
Test questionable ice with a pole and avoid glazed or refrozen spots.
Use smooth, centered inputs; slow speeds; and soft knees.
Keep going for detailed setup, safety checks, and rescue steps.
Quick Overview
- Run tubeless fat-bike tires at very low pressures (typically 4–6 PSI) and use studs if ice is present for consistent traction.
- Inspect ice and surface visually and with a probe. Avoid glazed black ice, thin, slushy, or refrozen areas.
- Ride a low, centered stance with soft knees, smooth brakes, and gradual steering inputs to avoid sudden slips.
- Carry safety gear: whistle, survival blanket, compact first-aid, and a plug/seal kit plus a reliable pump.
- Plan routes on maintained or well-tracked lines. Check recent conditions, and always tell someone your route and ETA.
Ride/No-Ride Checklist for Fat Biking on Ice
Before you head out, run a short ride/no-ride checklist so you don’t get stranded or hurt on ice: confirm tire pressure (4–6 PSI), tubeless integrity, and studs. Check brakes, remove front derailleur if snow is expected, and secure lights and reflective gear. Weigh gear distribution and pack a first aid kit and survival blanket.
Do a quick clothing check: layers, insulated cap, buff, gloves, and footwear. Assess route basics from recent reports but avoid detailed route-reading here. Apply checklist practicality: prioritize items that prevent immobilization or hypothermia. Conduct a swift risk assessment: ice presence, temperature above 0°C, your skill level, and whether you have a companion.
If any red flags appear, skip the ride.
Choose Safe Routes: Reading Ice, Snow, and Trail Conditions
Having run your ride/no-ride checks, focus next on route selection by reading ice, snow, and trail signs so you can choose lines that minimize hazards. Scan for ice indicators: glassy sheen, dark patches, or refrozen slush near shorelines and low spots. Prefer packed, plowed, or well-tracked routes where traction is predictable.
Read snow horizons — the distant line where snow texture changes — to judge wind drift, crust, or hidden ruts. Avoid soft, wet, or convex surfaces that hide hazards and steer clear of unfamiliar frozen water unless you’ve practiced safe testing. Stick to maintained trails, follow signs, and ride the firmest track.
If conditions look uncertain, turn back or choose an alternate route with clearer footing.
Test Ice Thickness and Surface Safety
Start by treating every patch of ice as suspect and test it deliberately before committing your weight. You’ll do basic thickness testing by probing with an ice pick, screw driver, or pole from shore or solid ground; never stand on thin ice. Look for clear, blue ice (stronger) versus white or layered ice (weaker). Use a drill or auger where legal and safe to confirm depth; aim for recommended thickness for foot traffic plus a safety margin before riding near it.
For surface assessment, scan for cracks, slush, running water, air bubbles, and recent freeze-thaw patterns. Tap the ice to listen for hollow sounds and avoid areas with flowing currents, inflows, or pressure ridges. If unsure, stay off.
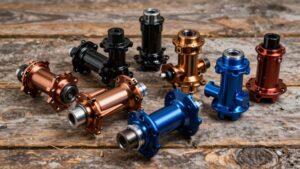
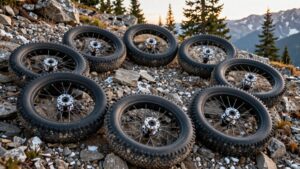
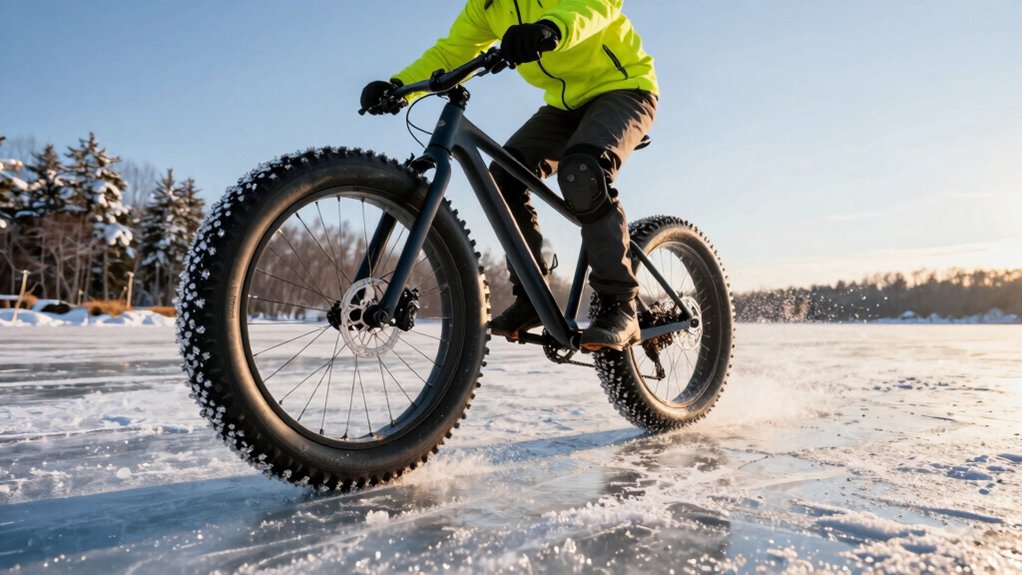
Set Up Your Fat Bike for Ice: Tires, Studs, Brakes, Drivetrain
Your bike needs to be configured specifically for icy conditions, so set up low-pressure tubeless tires (around 4–6 PSI) with studs if ice is present. Fit cable disc brakes or take steps to prevent hydraulic freezing. Simplify the drivetrain by removing the front derailleur to reduce snow build-up.
| Component | Action | Check |
|---|---|---|
| Tires | Tubeless, 4–6 PSI | No leaks |
| Studs | Install, correct orientation | Even contact |
| Brakes | Prefer cable discs | Smooth lever feel |
| Drivetrain | Remove front derailleur | drivetrain alignment |
| Setup | Test ride, adjust | No binding |
Install studs with consistent studs orientation; torque hardware; confirm drivetrain alignment; lube chain sparingly; and clear snow between rides.
Pack the Right Winter Gear for Fat Biking on Ice
Why pack carefully? You’ll want gear that keeps you warm, dry, and mobile without bulk. Start with boots rated for low temps and check boot compatibility with your pedals and crampons; stiff soles help power transfer, while flexible soles aid walking.
Layer clothing for ventilation and choose materials with proven fabric breathability so sweat won’t freeze. Carry insulated gloves plus a lighter liner pair to swap when wet. Bring an insulated skull cap or balaclava, neck buff, and high-visibility outer layer with reflective elements.
Pack a compact first-aid kit, survival blanket, and a multitool for on-trail repairs. Distribute weight evenly in frame bags or panniers to maintain balance and keep essential items accessible while riding.
Essential Riding Techniques to Stay Stable on Ice
How do you keep control when the surface turns slick? Shift your weight low and centered: drop hips, bend elbows, and keep knees soft so body positioning absorbs slips.
Look ahead, not at the front tire; anticipate slick patches and pick a line with consistent texture. Apply brakes gently and earlier: feather the rear to avoid lockup.
Use smooth, small steering inputs; sudden corrections will break traction. When pedaling, prioritize cadence over brute force and use torque modulation to avoid spinning the rear: rise only when necessary.
On climbs, stay seated to maintain rear grip, and lower the saddle for quick foot planting. Practice these moves at slow speeds until they become automatic; this way, you can react calmly when ice surprises you.
Avoid Crashes and How to Fall Safely on Ice
On ice, prevention beats reaction, so ride predictably and keep speeds low to give yourself time to spot hazards and choose a safe line. Stay loose, scan ahead, and use gradual inputs; no sudden braking or sharp steering. Practice mental rehearsal of trouble spots so your body reacts calmly. If a slide begins, relax your grip, look where you want to go, and shift weight to keep the bike steady.
Arms bent, elbows out, like a brace against impact. Legs ready to absorb with knees soft, hips back. Tuck chin and turn head to avoid face impact.
If you must fall, try to roll, protect your head with the helmet, and consider a shoulder brace afterward for persistent pain or instability.
If Ice Is Unsafe or Someone Breaks Through: Rescue Steps & Alternatives
Having a plan for when ice gives way is as important as knowing how to fall safely. If you spot thin ice or someone breaks through, act quickly but calmly. First, call emergency services and shout instructions.
Don’t rush onto the ice. Use rescue steps: reach with a pole, paddle, rope, or your bike laid flat to distribute weight; lie down and pull the person toward shore. If they’re submerged, prioritize getting them out; then warm them: remove wet clothes, wrap in a survival blanket, and begin gentle rewarming.
If the victim is unconscious, start CPR if trained. For yourself and your group, identify evacuation options: nearby shore exits, cleared roads for vehicle pickup, or short carries to a warm shelter. Report the incident to authorities and reassess route choices.
Trail Etiquette and Legal Rules for Icy and Snow Trails
Because icy and snowy trails change quickly, you should treat rules and etiquette as safety measures, not optional niceties. You must check trail permissions and local ordinances before you go to guarantee legal compliance and avoid fines or rescues. Yield to skiers and snowmobiles; announce passes and stick to designated routes to protect tracks and wildlife. Stay right on multiuse trails and use lights when visibility drops.
Imagine a groomed corridor: ride the firmest edge, not classic ski tracks.
Picture a narrow pass: dismount and walk your bike to let others by.
Visualize signage: obey closures, seasonal rules, and posted hazards.
Respect rules; travel with a partner and carry ID for accountability.
Quick Fixes on Trail: Punctures, Frozen Brakes, Lost Studs, and Ruts
Ever wonder how to keep riding when a stud pops, a tire bites the trail, or brakes ice up? You’ll need quick decisions: stop safely, assess damage, and prioritize movement. For puncture repair, use sealant or a plug kit for tubeless tires. Carry a mini pump and spare tubeless valve.
If a stud falls, pause for stud replacement with a spare stud kit or anchor the hole with a plug until you reach home. Frozen brakes often free with firm lever pulls; gentle spinning can warm pads, or you can swap to cable brakes if available. Ruts demand lower pressure and slow, smooth steering; avoid sudden corrections.
| Issue | Immediate Action | Tools |
|---|---|---|
| Puncture | Plug/seal | Plug kit, pump |
| Lost stud | Replace/plug | Stud kit |
| Ruts | Lower PSI, trim speed | Pressure gauge |
Frequently Asked Questions
You’ll want answers about essential safety gear, correct tire pressure, how to pick safe ice routes, and what to carry for emergencies. Use low (4–6 PSI) tubeless or studded tires as conditions require. Wear bright, insulated layers and a helmet, and test gear before you go.
Follow route rules; avoid suspect ice. Ride within your ability and carry a first aid kit, survival blanket, and means to call for help.
Essential Safety Gear
If you’re preparing for fat biking on ice, start by packing a concise, prioritized set of safety gear that covers protection, warmth, visibility, and emergency response. You should inspect helmet maintenance regularly: check fit, straps, and pads before every ride, and replace damaged shells. Prioritize glove insulation that lets you shift and brake without numb fingers. Carry a compact first-aid kit, a survival blanket, and a multitool with a pump or CO2. Use bright, reflective layers and a reliable headlamp for low light.
- A well-fitting helmet and face protection
- Insulated gloves, boot traction aids, and spare liners
- Emergency blanket, whistle, and compact repair kit
Check gear function before launch. Stow items for quick access.
Tire Pressure Tips
Want consistent grip and flotation on ice? You should aim for flotation optimization by running very low pressures, typically 4–6 PSI, so the tire spreads and rides on top of snow and thin ice. PSI management matters: check pressures cold and again after warming; small changes affect handling.
Use a reliable gauge and deflate in 1 PSI steps to find what suits your weight, cargo, and trail firmness. If you’re using studs, keep pressure toward the higher end of your low range to protect studs and reduce pinch risks. Prefer tubeless setups to tolerate lower PSI without pinch flats.
Before each outing, confirm tire seating and inspect for cuts. Adjust pressure for faster sections or icy patches, then revert when flotation is needed.
Ice Route Selection
Where should you ride when ice is part of the route? Pick paths that reduce exposure to thin or unpredictable ice: favor maintained trails, plowed lanes, and shorelines with known depth. Use route forecasting before you go to check recent temperatures and wind; those affect ice formation and safety.
Imagine a cleared snowmobile corridor with a packed, consistent surface. Picture a shoreline where currents prevent thick ice, and you stay far from the edge. Visualize a groomed trail on firm snow; avoid glazed patches and black ice.
Ride the firmest track, avoid unknown ice, and choose lines that let you bail to shore safely. Keep speeds low, scan ahead, and reroute at the first sign of new ice formation.
Emergency Preparedness
Because ice conditions can change in minutes, prepare for emergencies before you leave the trail: carry basic rescue and survival gear, know how to use it, and have a simple plan you can execute under stress.
Pack a compact first aid kit, survival blanket, whistle, mirror for survival signaling, a headlamp, multi-tool, rope, and an emergency bivy. Practice self-rescue drills and check gear function before each ride. If you or a partner falls through, prioritize getting out, removing wet layers, and using shelter building techniques to retain heat.
Signal for help early and mark your location. Share your plan and route with someone who’ll check in. Keep clothing layers accessible, distribute gear weight evenly, and stay calm: planning saves lives.
Conclusion
You’ve got the basics to ride Fat Bikes on ice safely: check conditions, test ice thickness, outfit your bike with wide tires and studs, and pack rescue gear and warm layers.
Ride slowly, steer clear of questionable areas, and carry tools for punctures, frozen brakes, or lost studs. If someone breaks through, call for help and use rescue techniques only when it’s safe.
Stay legal, respect trails, and choose safer alternatives when in doubt.
Related: Pre-Ride Bike Safety Checklist