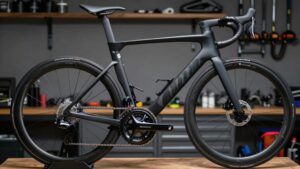
How to Plan a Road Bike Component Upgrade
You should start by defining performance goals and a realistic budget.
Then verify frame, fork, wheel and brake standards (axle, rotor mount, rim vs disc) so new parts will fit.
Match crank spindle, bottom bracket shell, cassette freehub and derailleur capacity to avoid surprises.
Decide mechanical or electronic shifting with battery access.
Factor wheels, rotors, and tools or shop labor into costs.
Keep following for a step-by-step compatibility and installation plan.
Quick Overview
- Define your upgrade goal and budget upfront: performance, weight, braking, or electronic shifting to prioritize parts and phases.
- Verify frame and wheel compatibility: axle type, brake mounts, rotor clearance, freehub body, and BB shell before buying.
- Choose a coherent groupset ecosystem: speed, chain width, derailleur capacity to avoid mixing incompatible parts.
- Plan labor, tools, warranty, and returns. Factor professional installation for complex swaps like disc brakes or electronic shifting.
- Allocate costs by component (groupset, wheels, brakes). Decide between phased upgrades or full replacement based on impact.
Quick Compatibility Checklist: Can You Upgrade?
Wondering if your bike can take the upgrade? You’ll check frame aesthetics and color matching only after confirming mechanical compatibility. Start with axle standard: thru-axle or quick-release dictates hub and rotor choices.
Verify brake mounts—rim or disc—so calipers and rotors fit without frame or fork modification. Match bottom bracket shell to your intended crankset spindle type and width. Confirm derailleur hanger style and cassette freehub body when choosing cassette speed and derailleur.
Assess wheel rim compatibility for new brake type and cassette range. Evaluate whether the frame provides mounting and clearance for electronic shifting batteries or hydraulic hose routing. Record each specification before buying parts to avoid wasted expense and installation headaches.
Groupset Upgrade: Set Goal and Budget
Now that you’ve confirmed mechanical compatibility, set a clear goal and budget for the groupset upgrade: decide whether you want faster shifting, lighter weight, electronic shifting, or better braking. Then assign a realistic spending limit that includes parts, labor, and any necessary wheel or brake changes.
Clarify goal scope (performance, weight, reliability) and use budget framing to allocate portions: groupset, cassette/chain, labor, and ancillary changes. Prioritize components that deliver the biggest gains for your riding.
| Priority | Component | Estimated cost range |
|---|---|---|
| 1 | Shifters/derailleurs | $200–$1200 |
| 2 | Crankset/BB | $150–$800 |
| 3 | Brakes | $100–$700 |
| 4 | Cassette/chain | $50–$300 |
| 5 | Labor/tools | $50–$300 |
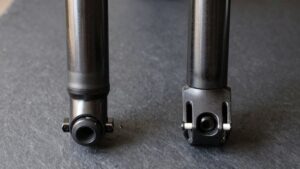
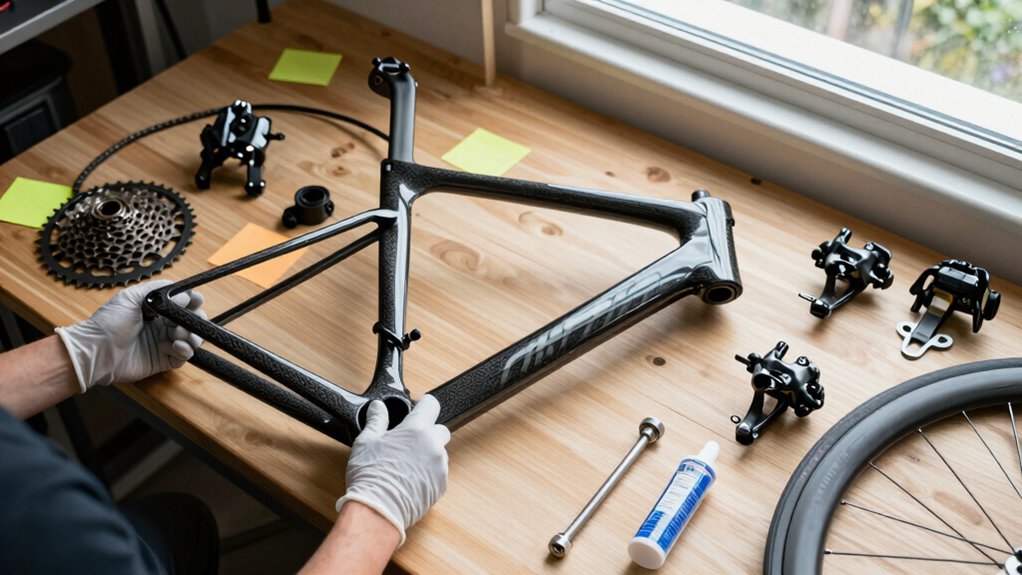
Frame, Fork, Wheel & Brake‑Mount Compatibility
Because your frame, fork, wheels, and brake mounts dictate what components will actually fit and perform, check their standards first: verify axle type (thru-axle vs quick-release and specific diameters/spacing), brake mount (IS, post, flat-mount for disc or rim-brake bosses), rotor clearance and caliper spacing on the fork and rear triangle, and wheel hub/cassette compatibility (freehub body type and max cassette width).
Then confirm frame geometry affects chainstay length and brake caliper access, which influence wheel size and tire clearance. Match wheel axle standards to hubs and replacement rims; don’t assume adapters solve structural mismatches.
Inspect fork rake and crown race for headset and rotor alignment. Finally, document mount threads, torque specs, and maximum rotor size so new brakes and wheels perform safely and predictably.
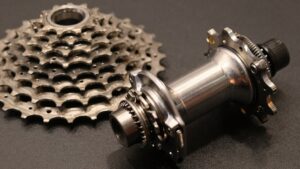
Drivetrain Compatibility: Crankset, Bottom Bracket, Cassette, Chain
How will the crankset, bottom bracket, cassette, and chain work together on your bike? You’ll verify bottom bracket shell type and spindle length to match crank geometry. Then choose a cassette and chain compatible with sprocket spacing (speed). Monitor chain wear to prevent accelerated cassette and chainring damage.
Fit the correct bottom bracket adapter for spindle diameter and frame standard; wrong fit alters chainline and shifts poorly. Select cassette tooth range that matches derailleur capacity. Use chain-sizing methods after installing crankset and cassette. If replacing only one part, confirm tooth profile and speed rating match existing components to avoid premature wear.
| Component | Key check |
|---|---|
| Crankset | Spindle, chainline |
| Cassette | Speed, tooth range |
| Chain | Wear, width |
Mechanical vs Electronic Shifting : Frame & Battery Considerations
While mechanical shifting relies on routed cables and headset- or bar-mounted housing stops, electronic systems depend on frame provision for battery placement, wiring channels, and reliable signal paths. You should confirm your frame supports the chosen setup before buying.
Check internal routing, downtube battery bays, and seatpost-mounted battery clearance if you pick Di2, eTap, or EPS. Mechanical setups save you from battery management but need clean cable stops and compatible lever pull.
For electronic, verify battery life expectations and understand cell chemistry: Li-ion cells need proper charging and storage to preserve capacity. Also confirm derailleur hanger alignment, connector access, and whether your frame’s axle and brake standards accept the groupset to avoid surprises during installation.
Choose Brakes: Rim vs Disc and Hydraulic Options
After you confirm frame provisions for electronic shifting and axle/brake standards, decide whether rim or disc brakes suit your bike and riding style. Rim brakes remain lighter and simpler; they use specific pad materials for rim wear. You’ll check rim surface condition and caliper compatibility.
Discs give consistent modulation and wet-weather performance but need compatible hubs, mounts, and rotor sizes. Choose mechanical discs for simple maintenance or hydraulic systems for better power and control. If you go hydraulic, verify hose routing and reservoir access. Learn the bleed procedure for consistent lever feel, and source correct mineral oil or DOT fluid per manufacturer.
Match brake choice to wheelset and frame limits. Then select calipers, rotors, and pads accordingly.
Tools, Parts & Pro Services Checklist
Gather the right tools, parts, and pro services before you start any upgrade to avoid delays or compatibility mistakes. You’ll need a definitive list: multi-tool, Allen set, chain tool, cassette remover and chain whip, pedal wrench, tire levers, and a calibrated torque wrench to meet manufacturers’ torque specs.
Stock spare parts include a new cassette, chain, appropriate bottom bracket, ferrules and cable ends, cable ferrules for neat routing, fresh housing, and correct-length brake hoses or electronic junctions.
Decide which jobs you’ll DIY and which require a shop. Complex groupset swaps, hydraulic brake bleeding, and bottom bracket fits are worth pro attention. Confirm shop labor estimates and whether they provide test rides and warranty sign-off before scheduling work.
Step‑By‑Step Installation and Tuning Sequence
With your tools, spare parts, and pro services arranged, begin by removing the old groupset methodically: disconnect and label cables or electronic junctions. Unbolt and extract the crankset and bottom bracket, then remove front and rear derailleurs, cassette, chain, and brakes in that order so you can inspect mating surfaces and frame mounts for damage or unique fittings.
Next, install the bottom bracket and crank per manufacturer torque specs; fit cassette and chain. Then mount derailleurs and shifters, adjusting B-tension and limit screws. Install brakes, bleed hydraulic lines if needed, and set caliper alignment.
Protect paint protection areas during torqueing and cable routing. Finish with precise indexing, chain wrap check, and short aero testing rides to validate shifting under load and brake performance.
Frequently Asked Questions
You’ll want clear answers on compatibility: what fits your frame, wheels, axles, brakes, and bottom bracket before you buy. Budget questions should weigh part cost, tool investment, and shop labor versus doing the install yourself.
Also, confirm required tools, installation complexity, and the seller’s warranty/return terms so you’re not surprised after fitting and testing.
Common Compatibility Questions
Wondering whether that new groupset will fit your frame and wheels? You’ll check specific measurements and standards before buying: bottom bracket shell type, derailleur hanger alignment, brake mount, pedal threading, and hub width. Ask concrete questions and verify specs.
- Will the crankset match my bottom bracket and pedal threading? Measure shell type and thread pitch; adapters exist but add complexity.
- Does the cassette speed match my hub width and freehub body? Confirm hub width and axle standard (thru-axle vs QR) to avoid spacing issues.
- Can my frame accept disc brakes or electronic shifting? Inspect brake mounts, cable routing, and battery/bulkhead access.
Answering these questions prevents wasted purchases and confirms a smooth install.
Cost And Budget Considerations
How much will a groupset upgrade really cost, and where should you expect to spend most of your budget? You’ll pay most for the groupset (crankset, derailleurs, shifters) and wheels; brakes and cassette/chain follow.
Weigh financing options against immediate outlay and consider opportunity cost of riding older parts longer.
| Component group | Typical share of budget | Priority note |
|---|---|---|
| Groupset (incl. crank/BB) | 40–60% | Core performance gain |
| Wheels | 20–35% | Large speed/weight impact |
| Brakes/cassette/chain | 10–20% | Safety and smoothness |
Set a target budget, allocate by impact, and decide if phased upgrades or full replacement gives better value given maintenance and resale considerations.
Installation And Tools Needed
Because installation quality directly affects safety and performance, you should match tools and techniques to the specific components you’re replacing. Use purpose-built tools: a torque wrench for carbon parts, a cassette tool and chain whip for the drivetrain, and a bottom-bracket tool sized to your shell. Prioritize tool ergonomics to reduce fatigue and improve control during fine adjustments.
Maintain clean workspaces and dust management when opening sealed bearings or electronic junctions. Contamination shortens component life. If you’re unsure, get professional installation for complex groupset swaps.
- Basic kit: multi-tool, Allen set, torque wrench.
- Drivetrain-specific: chain tool, cassette remover, pulley alignment gauge.
- Brake/crank: rotor truing tools, bottom-bracket wrench, pedal wrench.
Follow manufacturers’ torque and assembly specs precisely.
Warranty And Return Policies
After finishing installation and confirming torque specs and clean assembly, check warranty terms and return windows for each upgraded component before you ride. You’ll want to note warranty duration for drivetrain, brakes, wheels, and electronics: the periods vary by manufacturer and often require registration.
Keep original packaging and receipts to preserve return eligibility and speed any RMA. For electronic shifting, document firmware and serial numbers; some warranties require dealer-installed proof. If a part fails, contact the vendor immediately and follow their diagnostic steps to avoid voiding coverage.
Understand labor reimbursement limits and whether shop installation affects claims. For used or discounted parts, expect limited or no coverage. Track all correspondence and deadlines so warranties and returns stay valid.
Conclusion
You’ve got a clear roadmap: confirm compatibility, set a groupset goal and budget, and match frame, fork, wheels and brake mounts before buying crank, BB, cassette and chain.
Decide mechanical or electronic. Check frame clearance and battery mounts. Then pick rim or disc brakes and hydraulic specifics. Gather the right tools, new parts and pro help if needed.
Then follow an ordered install and tune sequence. Upgrade thoughtfully and prioritize fit, shifting precision and safety.
Related: Road Bike Upgrade Priority Guide
Related: How to Choose a Road Bike
Related: Home
Related: Contact Us